Why you should try Svelte
Update (October 2025): This post was originally published in January 2020 about Svelte 3. Since then, Svelte has evolved significantly with Svelte 5 (released in 2024) introducing runes, a new reactivity model, and improved performance. The core concepts in this article remain valid, but some syntax and APIs have changed. See the Svelte 5 migration guide for the latest updates.
I recently came across the new rising star when I watched the stateofjs 2019. They received the "Prediction Award," which means they are "awarded to an up-and-coming technology that might take over… or not?". I read about Svelte, but nothing caught me initially. But stateofjs made me curious, so I visited the website.
Update 2025: In the State of JS 2023 survey, Svelte maintained strong satisfaction ratings with 89% retention, proving it's far more than just hype.
My first impression was okay. It is:
a radical new approach to building user interfaces...
and Svelte
writes code that surgically updates the DOM when the state of your app changes.
Okay, nice...yeah, that sounds nice! I didn't know at this moment that I will recommend the framework for your next app, but it got my attention. I am into ReactJs and Angular for years, and I thought that these are enough frontend frameworks. I took a look at VueJs, and I liked it as well, but I never used it in a project.
Back to the topic! They encourage you to read their "introductory blog post", so I continued. And here it started. You all should watch the video from Rich Harris about "Rethinking Reactivity". Even if you are not interested in learning Svelte, if you only like ReactJs, Vue, or any other reason. The talk is very entertaining.
Tl;dr
Check out what you need to know for your first component in Svelte and learn the main advantages of version 3 from the compiler framework. This post tries to outline the key facts of Svelte and is not a comparison like angular vs. svelte.
If you like this article, please share it, follow me, check out my RSS feed, and subscribe to my newsletter.
Table of Contents
- What is Svelte?
- Why you should try Svelte?
- Where can you try it?
- How to start with your first component?
1. What is Svelte?
So what is it? It is a component framework. You define components and reuse them all over your web app, website, or whatever you are implementing. Just like in ReactJs VueJs, or any other framework. But what is the difference? One of the main differences is that runs at build time.
But what does that mean, it runs at build time? This means Svelte is more a compiler instead of a runtime component framework. It does not need any abstraction layer in the browser to run your code. It compiles the components you implement into plain JavaScript code.
Additionally, it comes with its build-in reactivity mechanism. Therefore you don't need any state management or external data binding library to sync your dynamic div class attribute.
2. Why you should try Svelte
...Frameworks are primarily a tool for structuring your thoughts, not your code. (Rich Harris)
Svelte is a framework. React and Angular are frameworks as well, and we could also consider using VueJs. What are the main arguments for using Svelte?
At deployment, you get less JavaScript, that running in your browser.
Apps developed are highly compatible. For example, if you develop a timer in Svelte, you can use the compiled version of your widget in any other framework. The component exports an autonomous class that you can use for your own app and mount to your DOM nodes. (note: There is a smililar method for React)
Without the abstraction layer of a runtime framework, you serve less code to the browser. Code splitting can be much more valuable. You serve your code without the framework code.
The maintainers are free in choosing the features they want to include in the framework. As Svelte itself is not in the compiled JavaScript output, they can add features without worrying about performance issues for runtime users. They can add many features, and none of us developers has any disadvantages because of the bundle size.
It is always good to keep an eye on such great approaches. And in terms of performance and user experience, I think JAMStack applications like GatsbyJs are indispensable.
3. Where can you try it?
The easiest way is to use their REPL. REPL is an online editor where you can check out the framework features in your browser. I recommend you to complete the svelte blog tutorials as well. They are built on each other very well, but still independent if you want to jump between features.
4. How to start with your first component?
If you want to build the app on your local machine, make sure you install NodeJs. Otherwise, you can use the REPL.
Updated Setup (2025): The recommended way to create a new Svelte project is now using SvelteKit or Vite:
Option 1: Using SvelteKit (recommended for full applications)
npm create svelte@latest svelte-tutorial
cd svelte-tutorial
npm install
npm run dev
Option 2: Using Vite (for component libraries or smaller projects)
npm create vite@latest svelte-tutorial -- --template svelte
cd svelte-tutorial
npm install
npm run dev
Note: The original
npx degitmethod shown below still works but is no longer the recommended approach. Modern tooling like Vite provides better dev experience with faster HMR (Hot Module Replacement) and optimized builds.
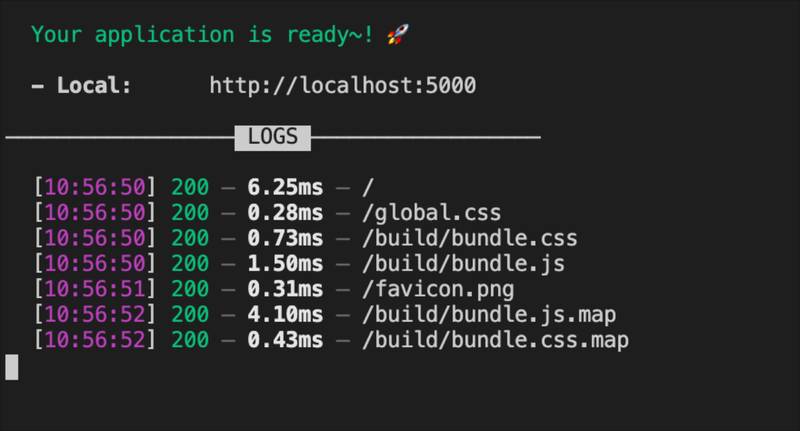
Visit your browser at the localhost address shown in the terminal (typically http://localhost:5173 for Vite).
Now we are ready to implement our first component.

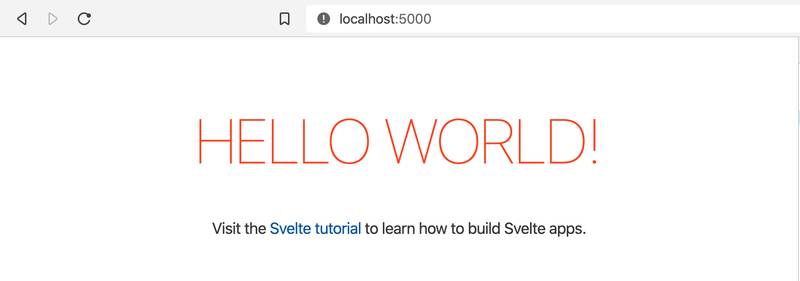
Visit your browser on localhost:5000 and check if the page is running.

Before we start coding let's have a quick look on the component basics:
Component parts
A component is declared in a .svelte file and contains three main parts.
- Markup
You code your Html in every component file. For example, a specific Html svelte component without style and JavaScript looks like this.
SimpleHeadline.svelte
<h1>Hello world!</h1>- Styles
Your component styles are wrapped between <style> tags and contain the Html for your component. We add some styles to our headline above, and I rename the file.
StyledHeadline.svelte
<style>
  h1 {
    font-size: 42px;
  }
</style>

<h1>Hello world!</h1>- JavaScript
We add <script> tags to our file. The script block contains the JavaScript logic. To illustrate that, I create another file called DynamicStyledHeadline.svelte.
<script>
  let name = "Nora";
</script>

<style>
  h1 {
    font-size: 42px;
  }
</style>

<h1>Hello {name}!</h1>
See how I also added the same variable into curly braces in the HTML {VARIABLE}. This is how you make the variable accessible for the template.
<script>
  import SimpleHeadline from "./components/SimpleHeadline.svelte";
  import StyledHeadline from "./components/StyledHeadline.svelte";
  import DynamicStyledHeadline from "./components/DynamicStyledHeadline.svelte";
</script>

<style>
  main {
    /* ... */
  }
</style>

<main>
  <SimpleHeadline />
  <StyledHeadline />
  <DynamicStyledHeadline />
  <!-- ... -->
</main>
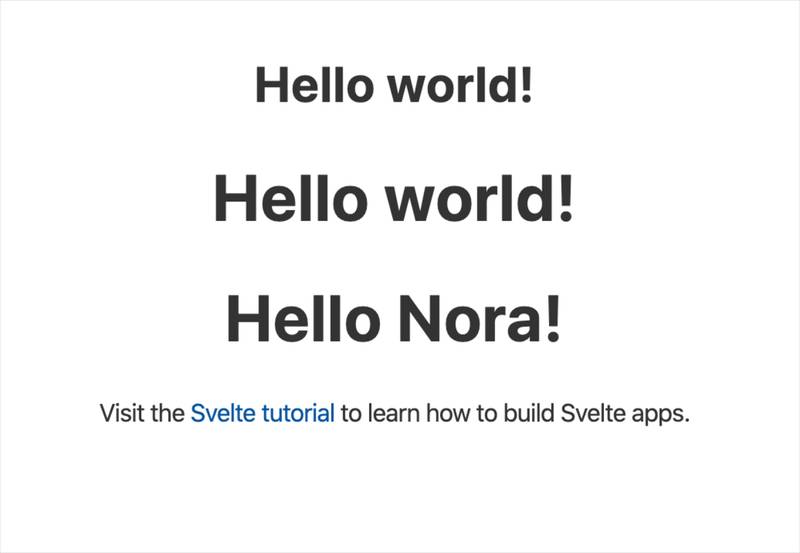
If you import the component into your App like above, you can see the DynamicStyledHeadline on your local page.

⚠️ Markup sanitization ⚠️ If you want to insert markup into you variable you can use an annotation like syntax. {@html string} will not sanitize your markup. You should escape it manually.
<script>
  let string = "this string contains some <strong>HTML!!!</strong>";
</script>
<p>{@html string}</p>
Svelte warnings
What I like are the warnings the framework is providing. In the example below you, a warning appears that no alt attribute is found. You can see the notification on your local development environment or in the REPL.
<script>
  let src = "tutorial/image.gif";
</script>

<img src="{src}" />
<img {src} />
<!-- shorthand -->
<!-- svelete expects this line with the alt attribute: <img {src} alt="A man dances."> -->
Component logic and conditional rendering
If/else statements
In most cases of your application, you need to render the markup in your application or component state's dependency. In Svelte, you implement this with if/else statements. If you used handlebars in any project, they might look familiar to you. Any conditional block starts with an # and ends with a /. If you want an else block, you use the : character like below. An else block can be plain or with another if-statement.
<script>
  let name = "Nora";
</script>

{#if name === 'Nora'}
<p>{name} - What a beautiful name.</p>
{/if} {#if name === 'Nora'}
<p>{name} - What a beautiful name.</p>
{:else if name === 'Linda'}
<p>{name} - I like that name</p>
{:else}
<p>{name} - The name is also beautiful.</p>
{/if}
Loops in Svelte
I the real world, we need to loop over data. Like an if-statement, you start the block with # and end with / character. You can loop over any object as long as it has a length property. You can loop over generic iterables with each [...iterable]. In our case, we loop through the names array and access the current name with the as keyword. Additionally, we get the current index as the second parameter.
You can use the destructuring syntax as well. In this case, you use each names as { name }.
<script>
  let names = [{ name: "Nora" }, { name: "Linda" }, { name: "Helga" }];
</script>

<h1>Beautiful names</h1>

<ul>
  {#each names as currentName, index}
  <li>
    <a target="_blank" rel="noopener" href="https://en.wikipedia.org/wiki/{currentName.name}_(name)">
      {currentName.name}
    </a>
  </li>
  {/each}
</ul>
Waiting for data with the await block
As we all have to deal with asynchronous web development, we also have to wait for it. The JavaScript language features like the await keyword help us with that. In Svelte, we get a handy syntax to wait for a promise to resolve: #await 🚀.
<script>
  let promise = getRandomNumber();

  async function getRandomNumber() {
    const res = await fetch(`tutorial/random-number`);
    const text = await res.text();

    if (res.ok) {
      return text;
    } else {
      throw new Error(text);
    }
  }

  function handleClick() {
    promise = getRandomNumber();
  }
</script>

<button on:click="{handleClick}">generate random number</button>

{#await promise}
<p>...waiting</p>
{:then number}
<p>The number is {number}</p>
{:catch error}
<p style="color: red">{error.message}</p>
{/await}
It might also be interesting:
5. What's next?
You find all the resources for this article on GitHub. Feel free to check it out, try some stuff, or fork it.
You should now be well packed for your first component. If you want to dive deeper, I recommend taking an hour or two of your time and going through the official Svelte training tutorial. 👨🏫
If you like this article, smile for a moment, share it, follow me, check out my RSS feed, and subscribe to my newsletter.
Cheers Marc
Updates
- 2025-10-12: Updated for Svelte 5, modern tooling (Vite/SvelteKit), State of JS 2023 data, and current best practices
- 2023-01-31: Added a section about current Svelte version, added a section about SvelteKit

